How To: Configure Global Entry Point for Your Store
Important
This article applies only to Store Builder Ultimate. In Multi-Vendor Ultimate, you can only configure automatic redirection between storefronts depending on the country.
About Global Entry Points
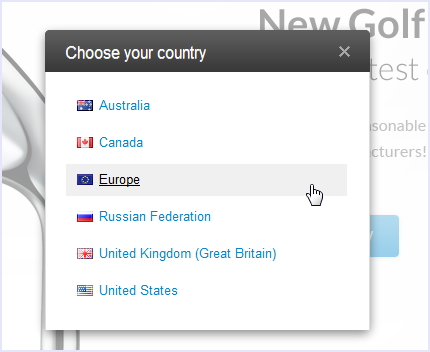
The global entry point is a pop-up window that your visitors see when they open a storefront for the first time. This window contains a list of countries. Every item in the list is linked to some specific storefront. Visitors choose a country from the list, then they get redirected to the respective storefront.

This feature comes in handy when you want to create several localized storefronts with different products for specific countries.
For example, you have a flagship store www.example.com that is intended mainly for visitors from the US. Its localized version www.example.ru targets the Russian market. And four other storefronts www.example.au, www.example.ca, www.example.eu, and www.example.co.uk contain information specific to Australia, Canada, the European Union, and the UK, respectively.
In this case the global entry point becomes an initial point of contact between the bunch of your storefronts and your visitors, ensuring that all of them find the necessary web store.
Important
The global entry point does not detect the location of visitors: they are free to choose their country themselves.
How to Create a Global Entry Point?
A global entry point is generated automatically based on the properties of the individual storefronts. To add a global entry point, follow these steps:
Go to Settings → Storefronts.
Click the name of the storefront you want to add a global entry point for.
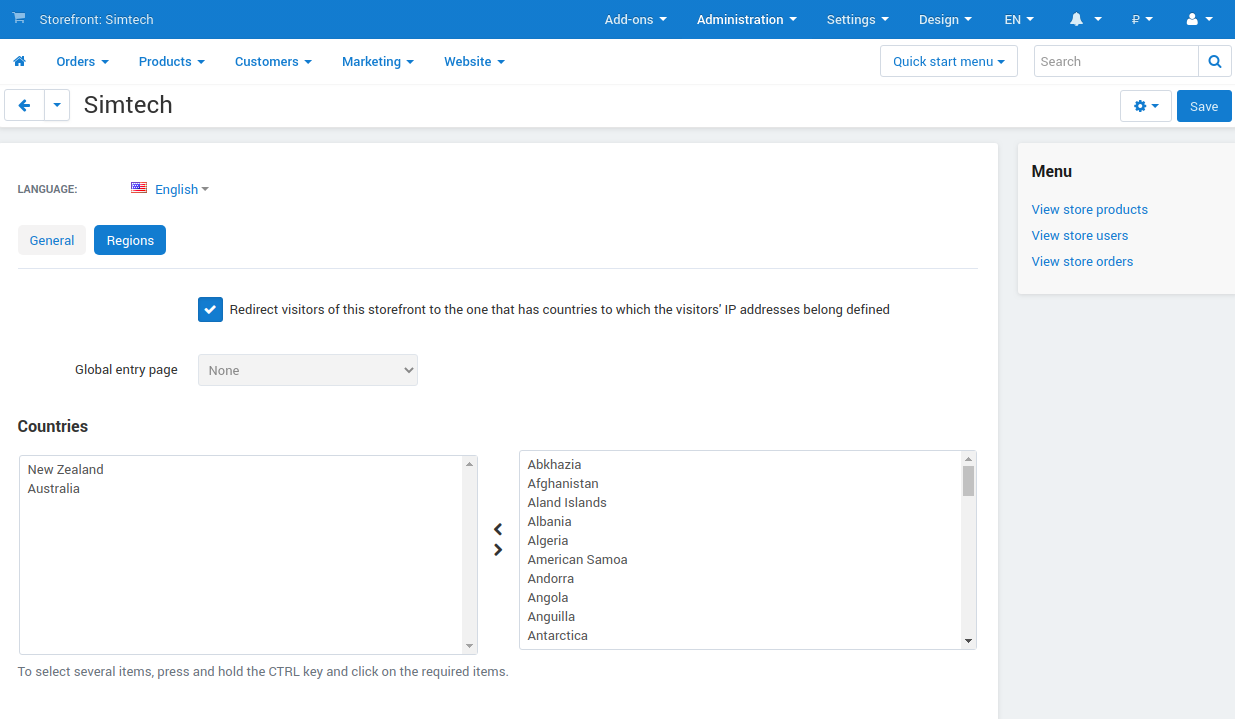
Switch to the Regions tab.
Enable the global entry point.
You can choose whether to activate the global entry point on the home page only, or on any storefront pages. The second option is useful when a visitor opens a specific page through a direct link.
Important
Even if you do not enable the global entry point for a particular storefront, you can still link this storefront to a country in the list. To do so, assign countries to the storefront as described below.
Assign countries to the storefront.
The box on the right contains the list of all available countries; the box on the left contains the list of countries assigned to this storefront. If no countries are selected, then the global entry point won’t direct visitors to this storefront.
To move items from one list to the other, use the twin horizontal arrows between the lists. To select multiple items, press and hold the Ctrl or Shift key while selecting.
Hint
To adjust the list of countries supported in your store, go to Settings → Shipping methods → Countries.

Repeat steps 4 and 5 for all the storefronts you need.
Note
If you assign a country to two or more storefronts, the corresponding list item of the global entry point will point to the first storefront you assigned this country to.
Questions & Feedback
Have any questions that weren't answered here? Need help with solving a problem in your online store? Want to report a bug in our software? Find out how to contact us.