How To: Set Up Apple Pay, Google Pay, and Credit Card Payments via Stripe
Make sure that the Stripe Payments add-on is installed and active. If not, install and enable the add-on.
Add a payment method. On the General tab, specify Stripe as Processor.
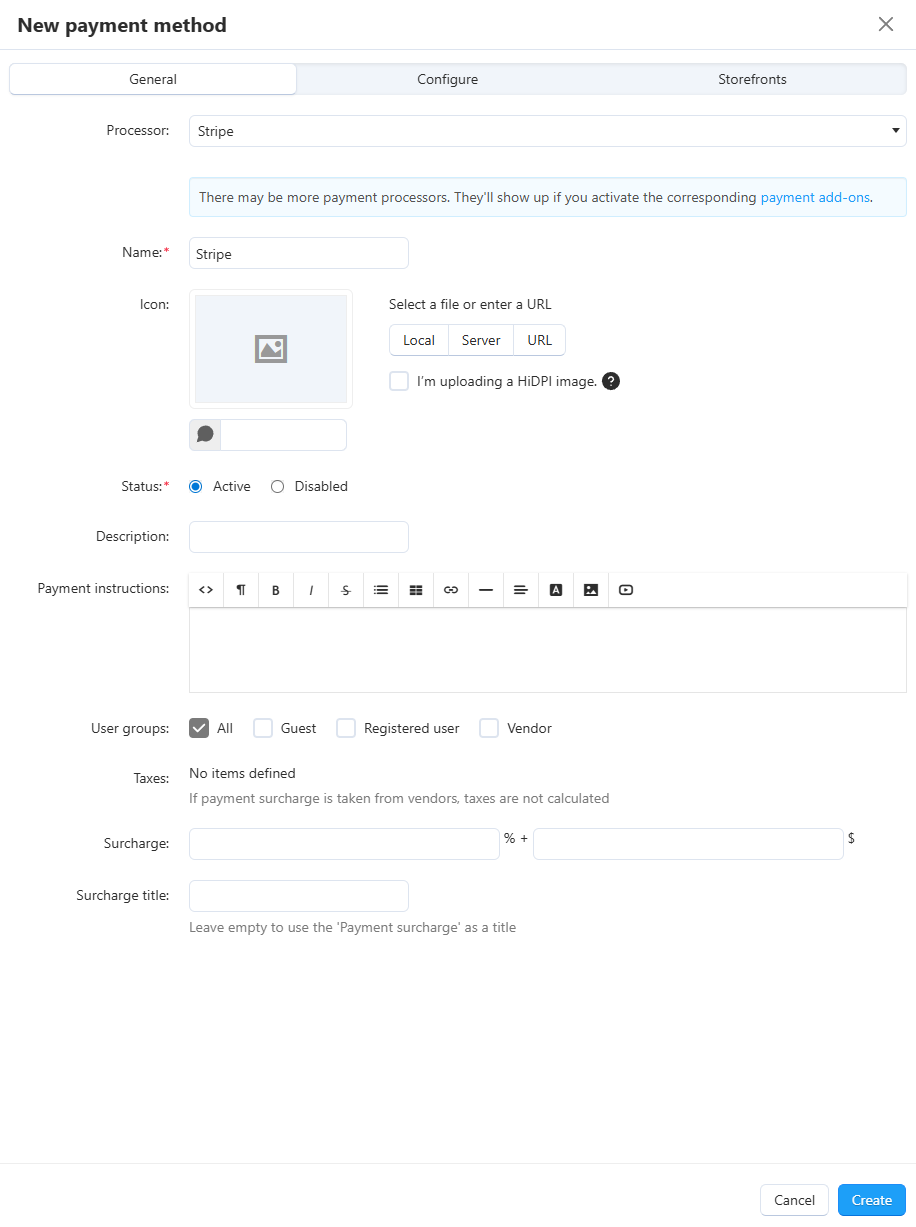
Learn more about other settings in this article.
Switch to the Configure tab and specify the settings:
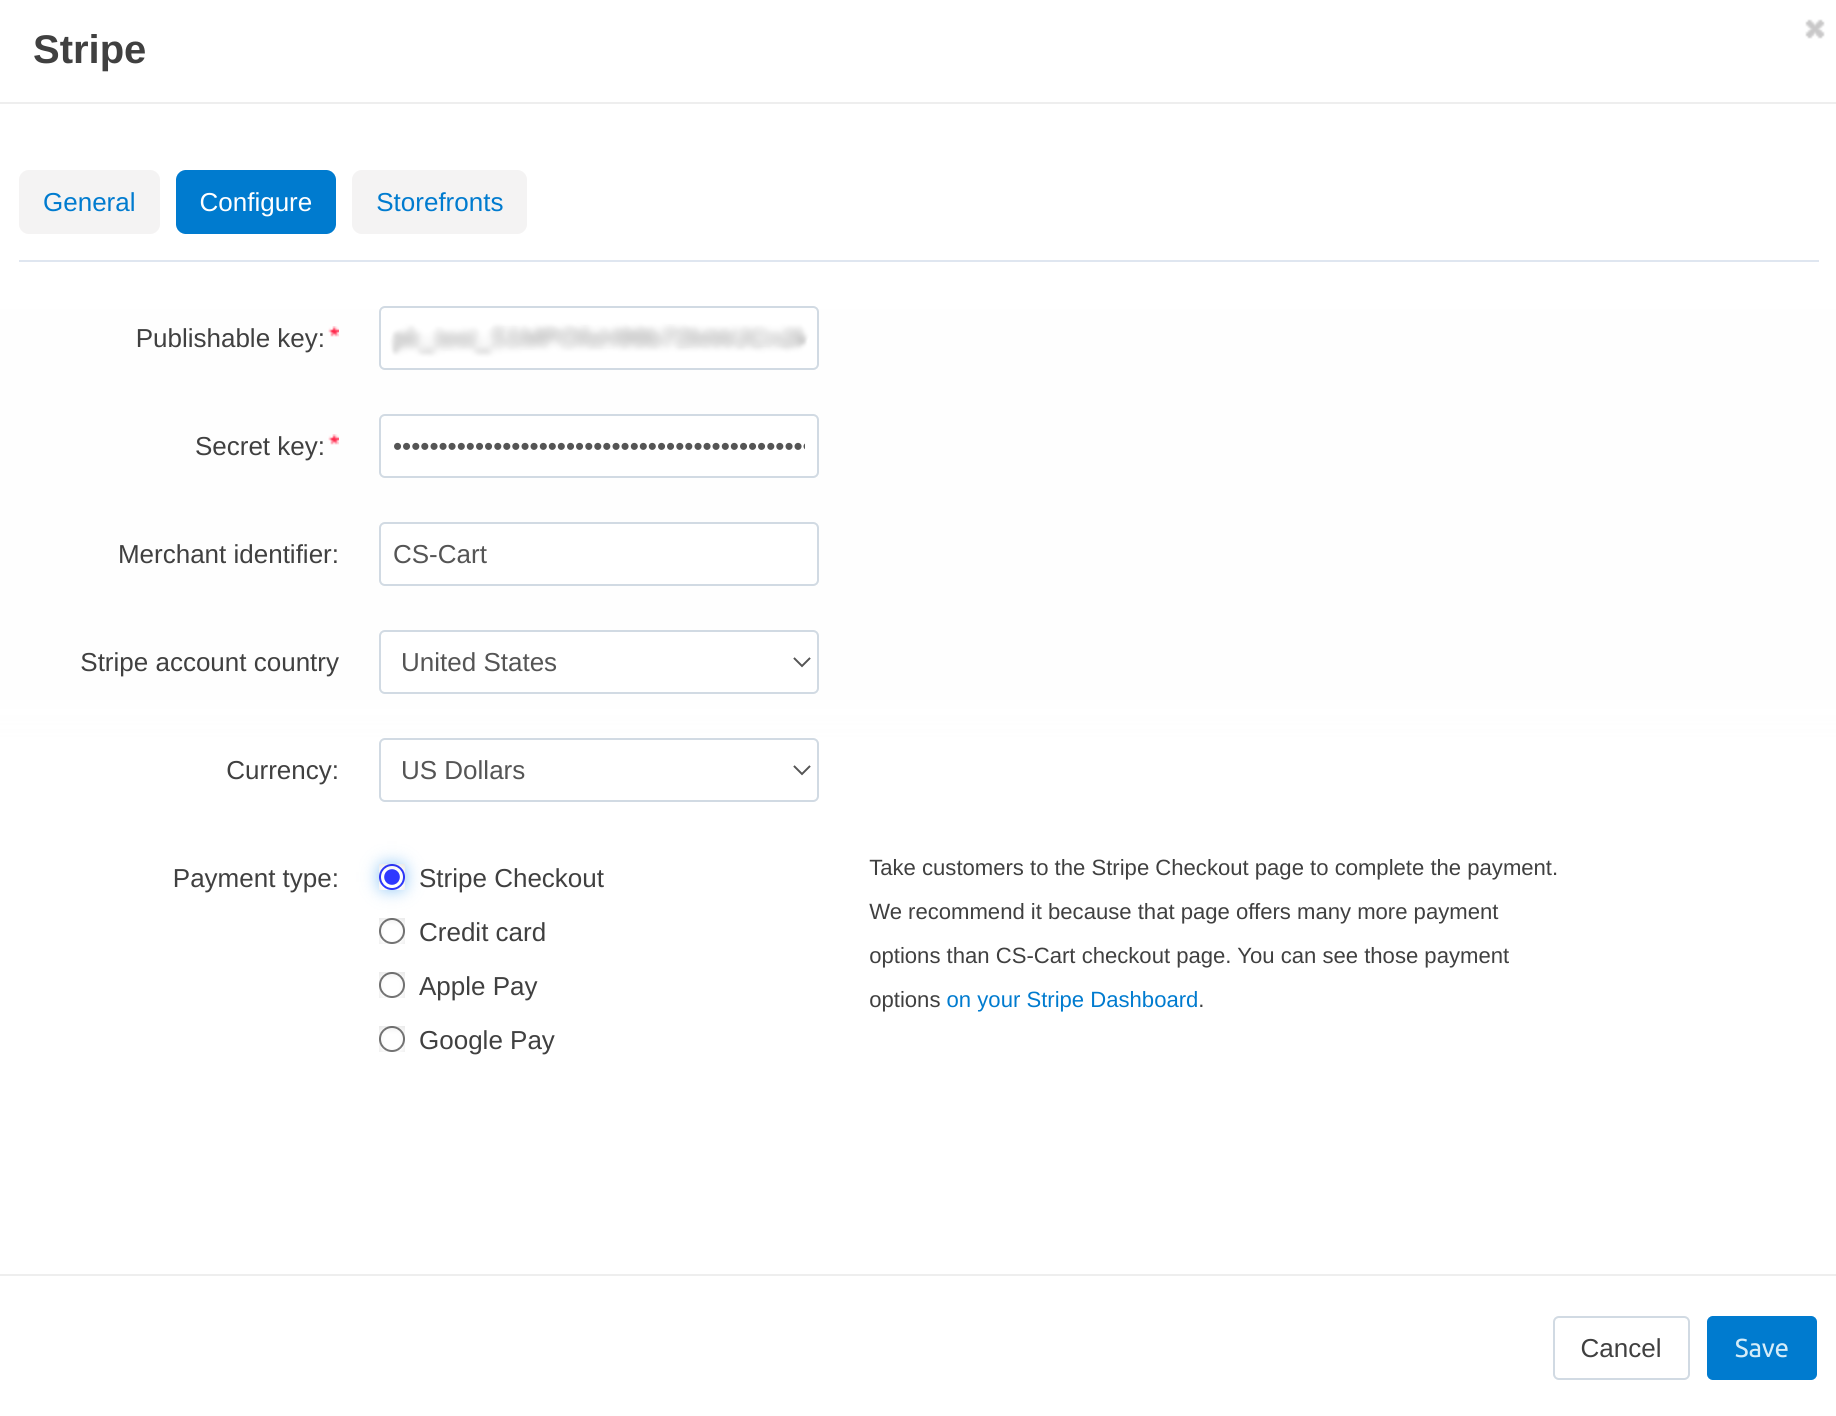
Publishable key—the publishable API key of your Stripe account (obtain it from your Stripe dashboard).
Private API key—the secret API key of your Stripe account. You can use:
- a full access secret key (
sk_...); it grants full access to all permissions at once. However, this approach is less secure: if the key is compromised, an attacker may gain unrestricted access to the entire account. - a restricted key with limited permissions, recommended by Stripe (
rk_...); it allows you to limit API permissions and reduce security risks. We recommend switching to a restricted key with only the required permissions for your store. If you use a restricted key, give it Write permission for the following sections:- Checkout
- Webhook
- Connect
- a full access secret key (
Stripe account country—select the country of your Stripe account.
Currency—the currency of your Stripe account.
Payment type—the types of payments this method accepts:
Credit card
Apple Pay
Google Pay
Stripe Checkout
Note
Starting with version 4.16.1, Stripe in CS-Cart supports Stripe Checkout. It allows more than 20 additional payment methods, including Apple and Google Pay. This means that you need only to enable Stripe Checkout in the payment method settings to let your buyers pay for their purchases through Apple and Google Pay.
If you want to set up Apple Pay and Google Pay via Stripe Checkout, then select the appropriate payment type and save the payment method.
If you want to configure Apple Pay and Google Pay directly, then follow the instructions below.
For Apple Pay or Google Pay, you must add the appropriate icon to the payment method. You’ll find the appropriate icon for each of the payment methods on the Configure tab. Apple and Google require their icons to be displayed at least as prominently as the other payment method icons in your store.
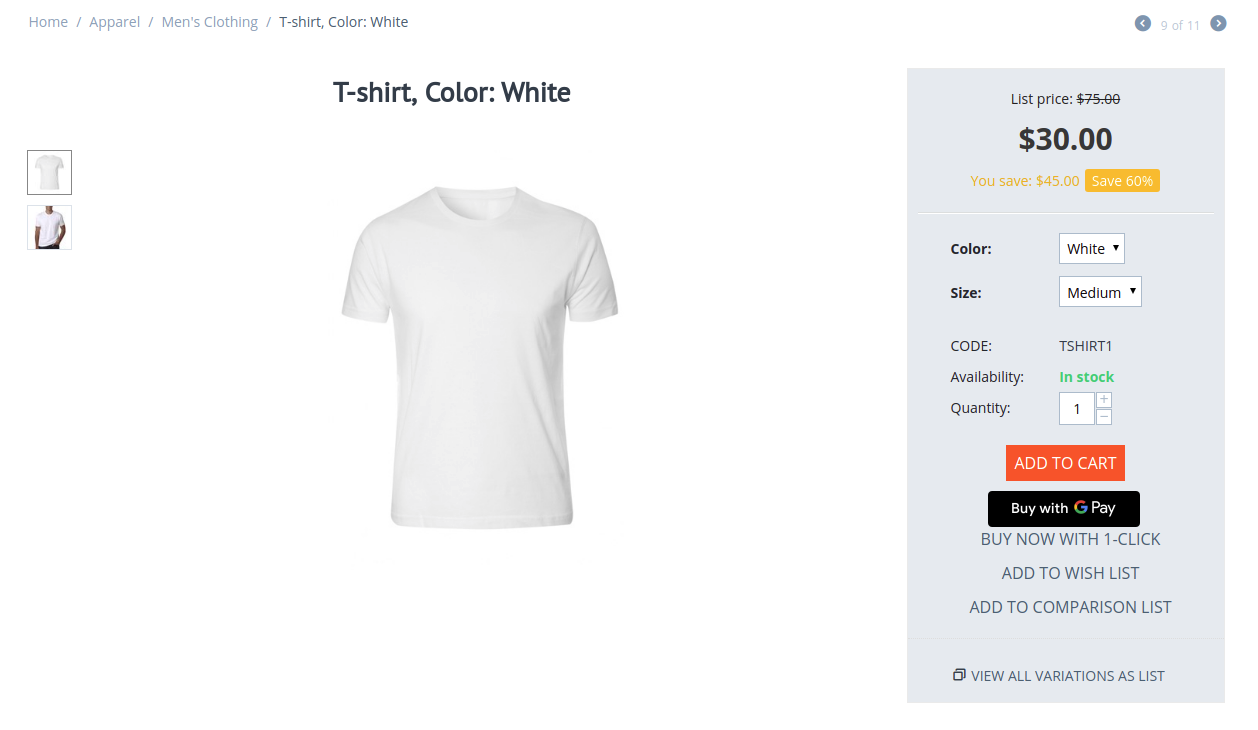
Choose whether to display the instant purchase button on the product page.
Click Create to finish the creation of the payment method. The payment method is now available to customers. Please note that:
The Apple Pay button will appear only in Safari on Apple devices.
The Google Pay button will appear only in Google Chrome, if a credit card is linked to a Google account.
Important
Read more in our blog: Apple Pay Not Working in Stripe? How to Solve It for CS-Cart
Questions & Feedback
Have any questions that weren't answered here? Need help with solving a problem in your online store? Want to report a bug in our software? Find out how to contact us.