Blocks
While containers form the storefront structure, blocks basically populate this structure with contents and functionality. Blocks can be viewed as separate boxes which represent a particular storefront component. This can be a search form, a currency or a language selector, top menu, product filter, banner, list of products, text, HTML insertion, etc. Just everything that can appear on the storefront is created using blocks.
Blocks differ from each other in the type of data they represent. However, blocks with the same data type can have different content, appearance, and configuration. Moreover, certain blocks may be assigned to specific items/pages only. This makes blocks a highly powerful and flexible tool for building custom storefronts and creating individual pages out of a typical framework.
CS-Cart already offers a number of predefined blocks. Use them to quickly add the most popular and common storefront components. In addition, you can create custom blocks based on the available templates.
You can rearrange blocks in the frame, add and remove blocks, edit block properties, activate and disable blocks, assign blocks to specific items/pages.
Editing Blocks in Real Time (on the Storefront)
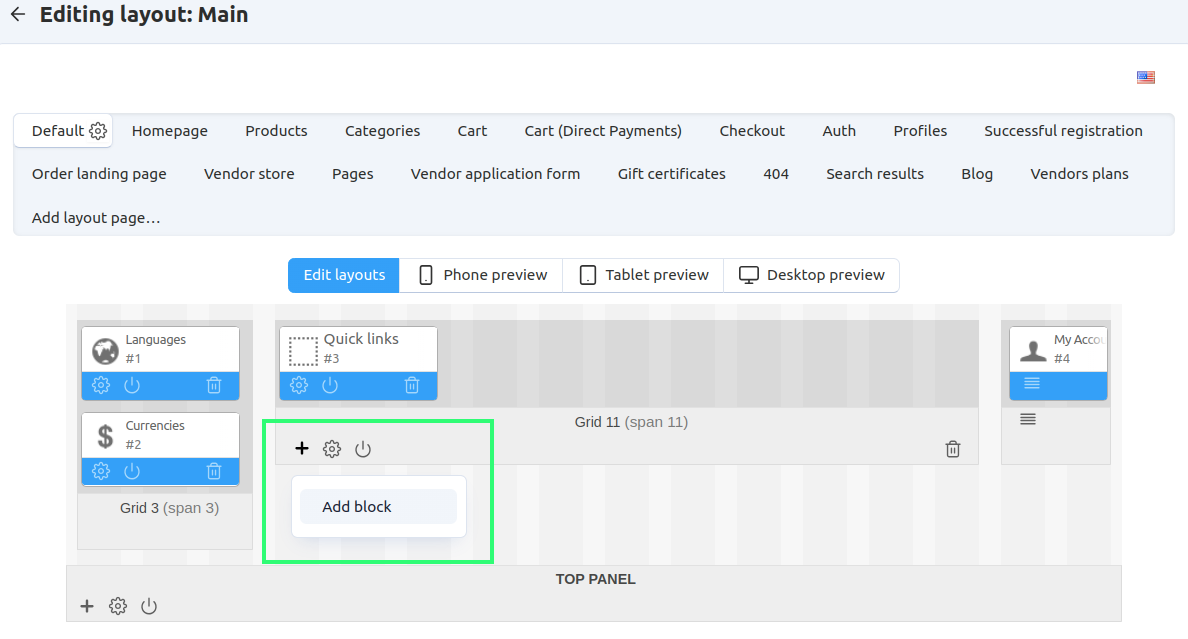
- In the Admin panel, open Website → Themes → Edit layout on-site and select the layout page where you want to make changes.
- To change the block position, just move it to the desired place.
Note
To edit blocks from the “Top panel”, “Header” or “Footer”, edit the Default layout page.
Editing Blocks from the “Layouts” menu
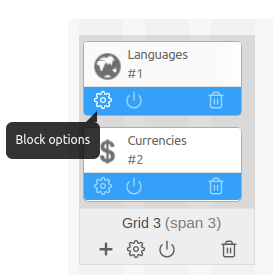
- Hover over the block and click the gear icon to open the block configuration form.
- Edit the block parameters.
- Click Save to apply the changes.
Note
Block types and properties are described in this topic.
Adding Blocks
When adding a block, you can use one of the following options:
To add an existing block:
Click the + icon on the container where the block should be placed and select Add Block.
Select Use Existing Block tab.
Choose a block from the list and click its icon.
The block will appear among the other objects in the frame.
To create and add a new block:
- Click the + icon on the container where the block should be placed and select Add Block.
- Switch to the Create New Block tab.
- Choose a block type and click its icon. This opens a window with the new block configuration.
- Set up the block parameters.
- Click Create when finished.
The block will appear among the other objects in the frame. Also, it will be added to the list of existing blocks.
Deleting Blocks
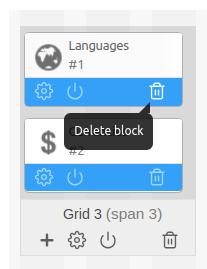
Move the cursor over the block and click the trash can icon.
When prompted, confirm the action.
Assigning Blocks
If a layout page represents a group of pages (for example, detailed product pages on the storefront), blocks are automatically assigned to all items in the group.
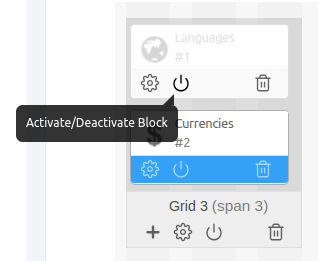
However, you can hide a block infor a specific item (product, category, page, etc.), if you want to hide the block on the corresponding storefront page. Similarly, you can force a block to appear on a particular storefront page if the block is deactivated in the layout page settings.
To hide/show a block on the storefront page of an item:
- Open the item’s detailed page in the Admin panel.
- Shift to the Layouts tab.
- Deactivate (hide) or activate (show) the block.
Use Cases for Block Configuration
- How To: Add a Block with Variations to Product Pages
- How To: Show Featured Vendors in Multi-Vendor
- How To: Create the Products on Sale Block
- How To: Arrange Categories on the Storefront Homepage
- How To: Add the Bestsellers Block to the Homepage
- How To: Display Different Banners for Different Category Pages
- How To: Hide Blocks on the Login and Profile Pages
- How To: Display the Newest Products on Pages
- How To: Create the Related Products Section on the Product Details Page
Questions & Feedback
Have any questions that weren't answered here? Need help with solving a problem in your online store? Want to report a bug in our software? Find out how to contact us.