How To: Display the Newest Products on Pages
How To: Display the Newest Products on All Pages
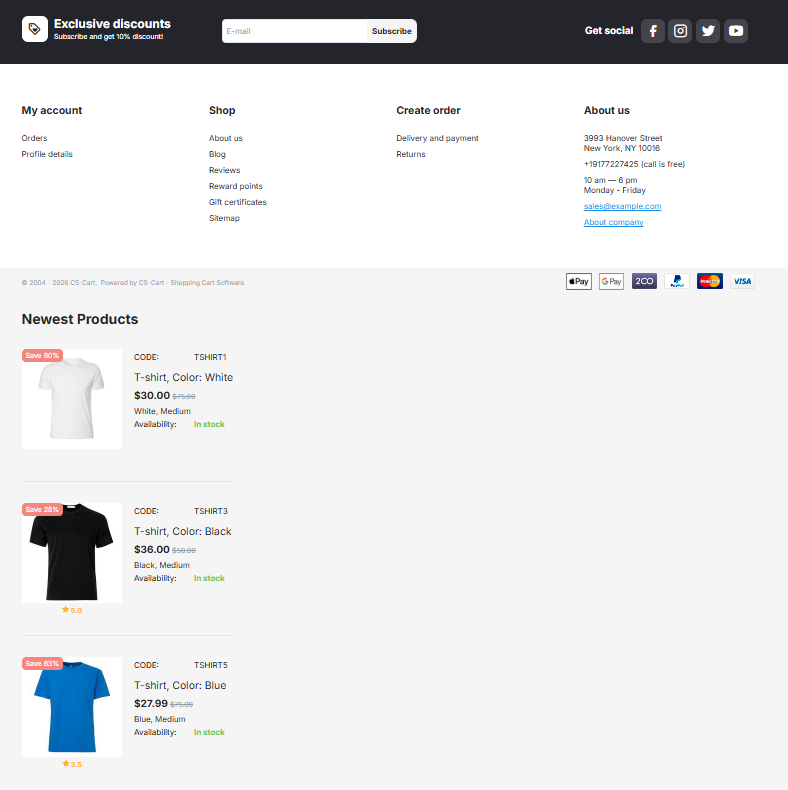
To display the section of the newest products on all pages:
In the Admin panel, go to Website → Themes → Layouts and select the Default layout page.
Click the + button in the desired container and click Add block.
Open the Create New Block tab and select Products.
Specify the name of the new block (e.g. Newest products) and click Create.
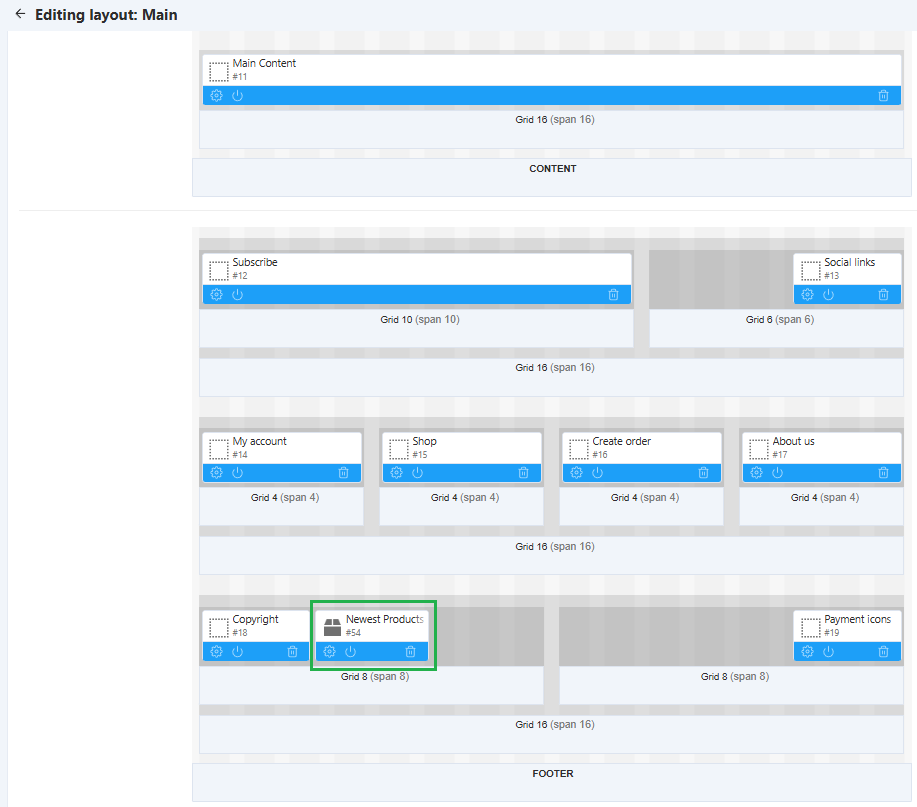
Click the gear icon on the block:
- From the Template drop-down menu, select Grid.
- In the Wrapper field, select any required wrapper (e.g. Important block).
- If necessary, specify the User-defined CSS-class in the corresponding field.
Go to the Content tab and select Newest in the Filling select box.
Click Save.
Note
The Newest products block will be displayed on all pages of the storefront.
If you do not want to display it on some pages (e.g. on the Checkout page), open the corresponding tab on the Layouts page (e.g. choose the Checkout tab at the top of the page) and change the block status to Disabled by clicking on the Activate/Deactivate Block icon.
Sometimes the block might be located in the Top Panel, Header, or Footer of the page; in that case, open the desired tab and click the Set custom configuration link and deactivate the block.
How To: Display the Newest Products on the Category Page
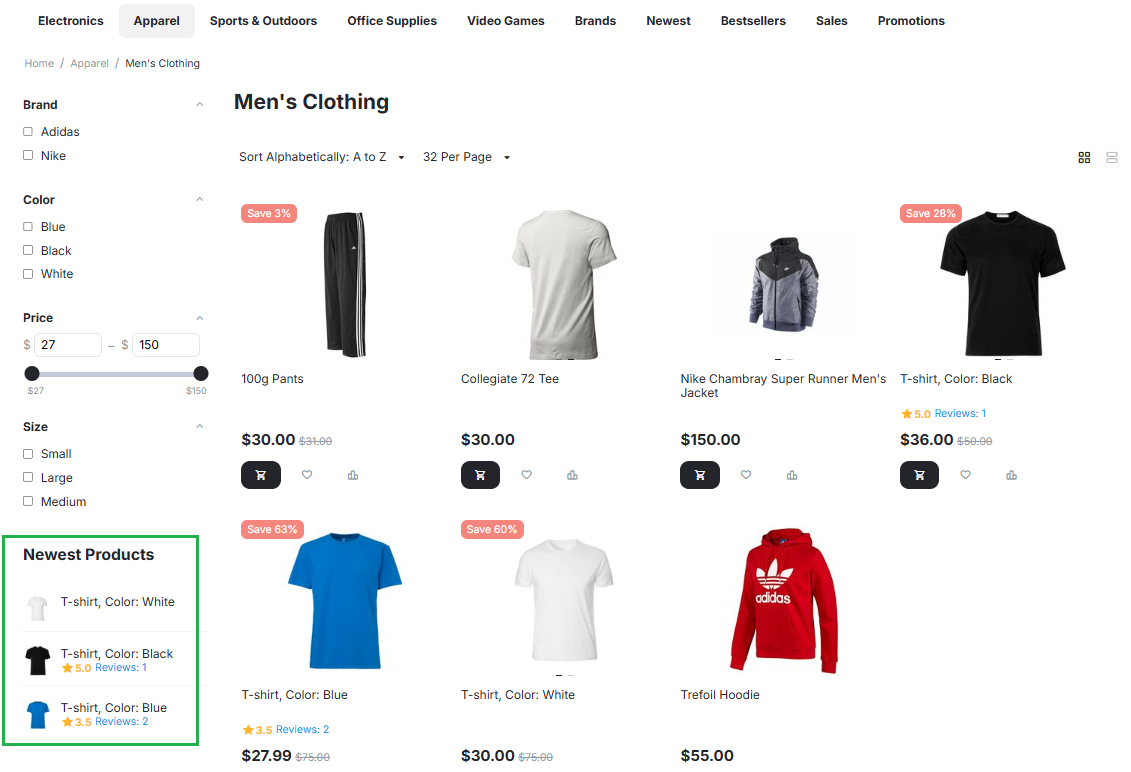
To display the section of the newest products on the category page:
In the Admin panel, go to Website → Themes → Layouts and select the Categories layout page.
Click the + button in the desired container and click Add block.
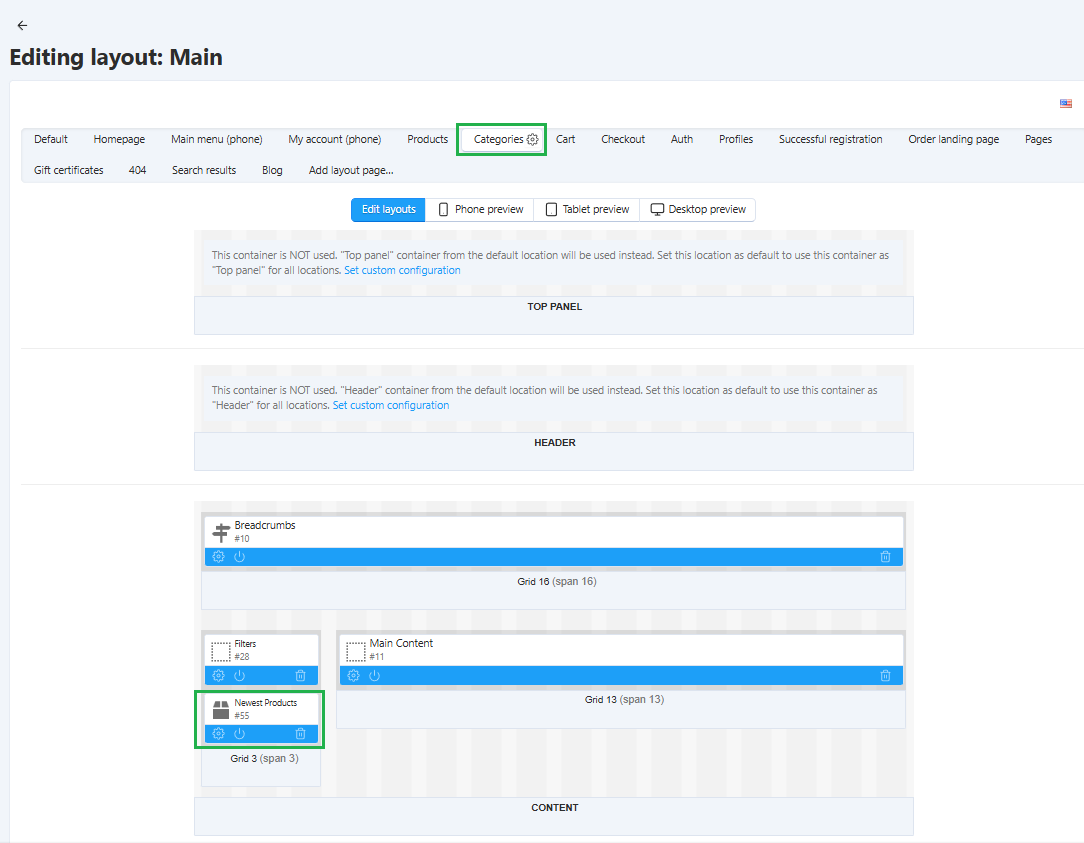
Open the Create New Block tab and in the opened section click Products.
Specify the name of the new block (e.g. Newest products) and click Create.
Click the gear icon on the created block:
- Select Small items in the Template field.
- Select the desired wrapper in the Wrapper field (e.g. Footer general).
- If necessary, specify a CSS class in the User-defined CSS-class field.
Open the Content tab and select Newest in the Filling select box. Configure the required fields.
Click Save.
Note
After the block is created or changed, make sure it is displayed correctly. Sometimes not all wrappers are suitable for the blocks.
Questions & Feedback
Have any questions that weren't answered here? Need help with solving a problem in your online store? Want to report a bug in our software? Find out how to contact us.